
Create a voice translation
You create a voice translation service in a wizard of three tabs: General, Languages, and Advanced. The activation mode you select on the first tab determines what the Languages tab asks for:
- Automatic start. Translation begins as soon as the call connects, and you configure one agent language and one customer language.
- Dynamic activation. The agent starts translation by entering a DTMF code once the customer's language is known, and you configure at least two languages, each with its own code.
This real-time translation service uses AI and may occasionally produce errors caused by language nuances or accents, so check critical translations for accuracy.
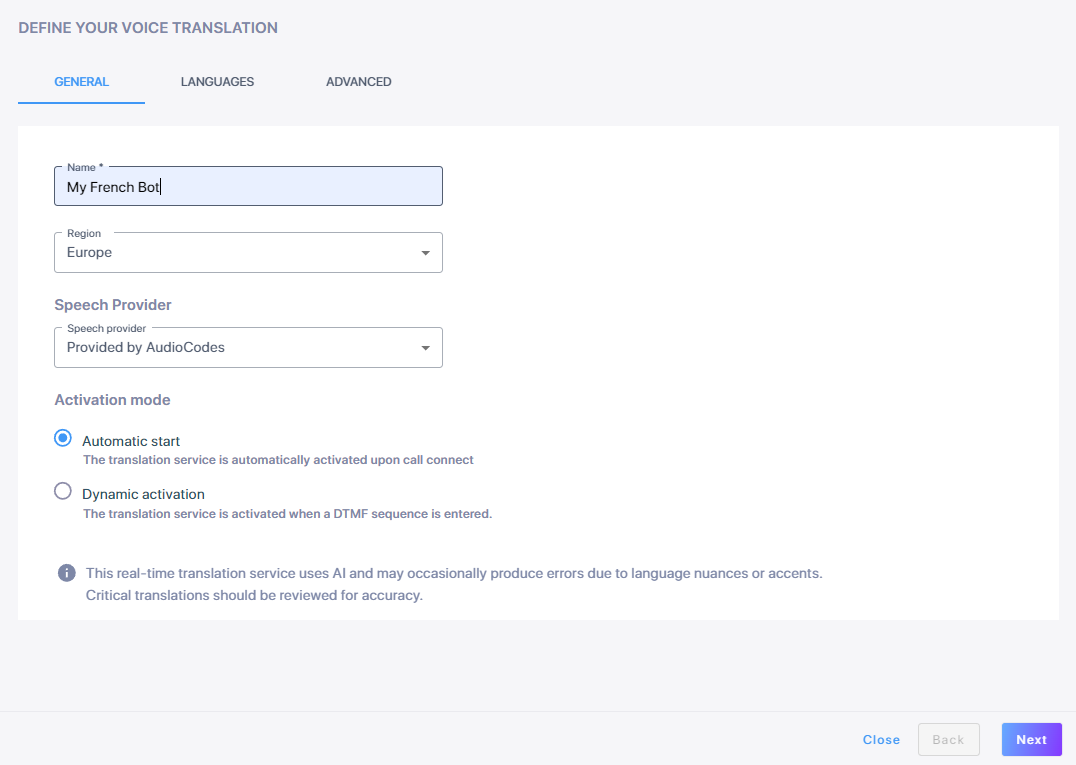
General
The General tab names the service and sets the region, speech provider, and activation mode it uses.
-
In the Navigation pane, expand Hub+, and select Voice translation.
-
Click Add new voice translation.
-
In the 'Name' field, enter a name for the translation.
-
From the 'Live Hub region' drop-down list, select the region your Live Hub voice infrastructure runs in. See Global region support.
-
From the 'Speech provider' drop-down list, select Provided by AudioCodes, the default, or one of your own. See Speech providers.
-
Under the Activation mode group, select Automatic start or Dynamic activation.
-
Click Next.
Languages
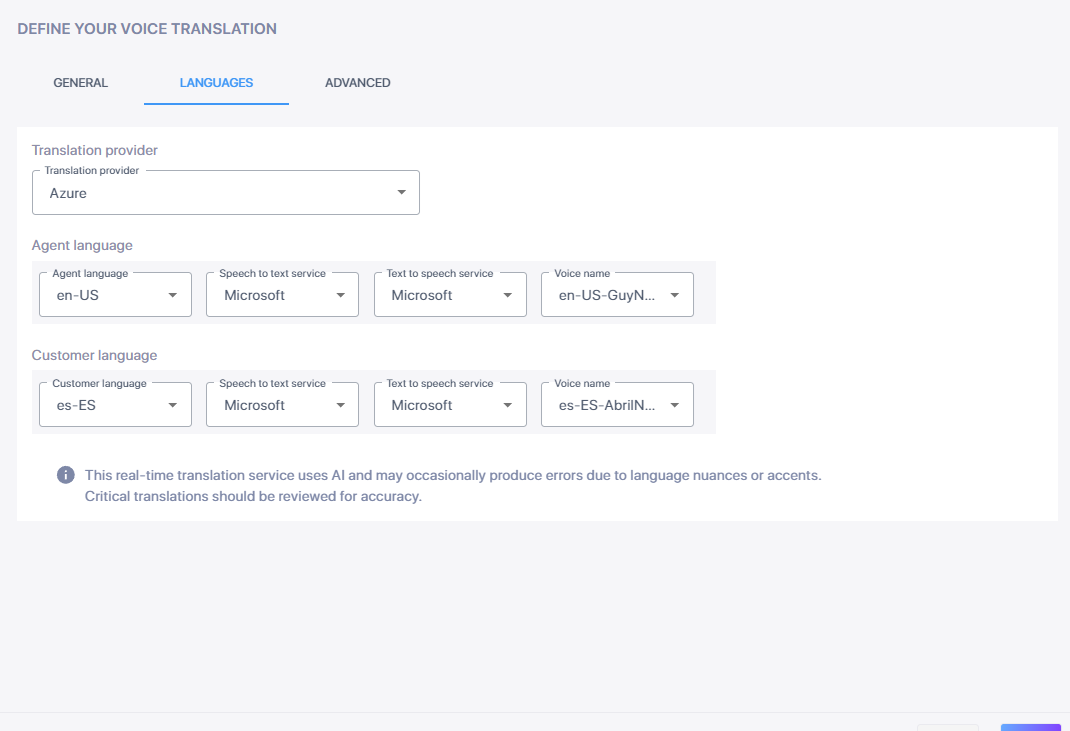
The Languages tab collects the languages themselves, and what it asks for depends on the activation mode you selected.
-
From the 'Translation provider' drop-down list, select Azure, Claude, or Open-ai.
-
Under Agent language, set up the language the agent speaks:
- From the 'Agent language' drop-down list, select the language, for example English (British) (en-GB).
- From the 'Speech to text provider' drop-down list, select Google v1, Google v2, or Microsoft.
- From the 'Text to speech provider' drop-down list, select Amazon, Google, or Microsoft.
- From the 'Voice name' drop-down list, select the voice the customer hears, for example en-GB-EthanNeural (Male).
-
Under Customer language, do the same for the language the customer speaks.
-
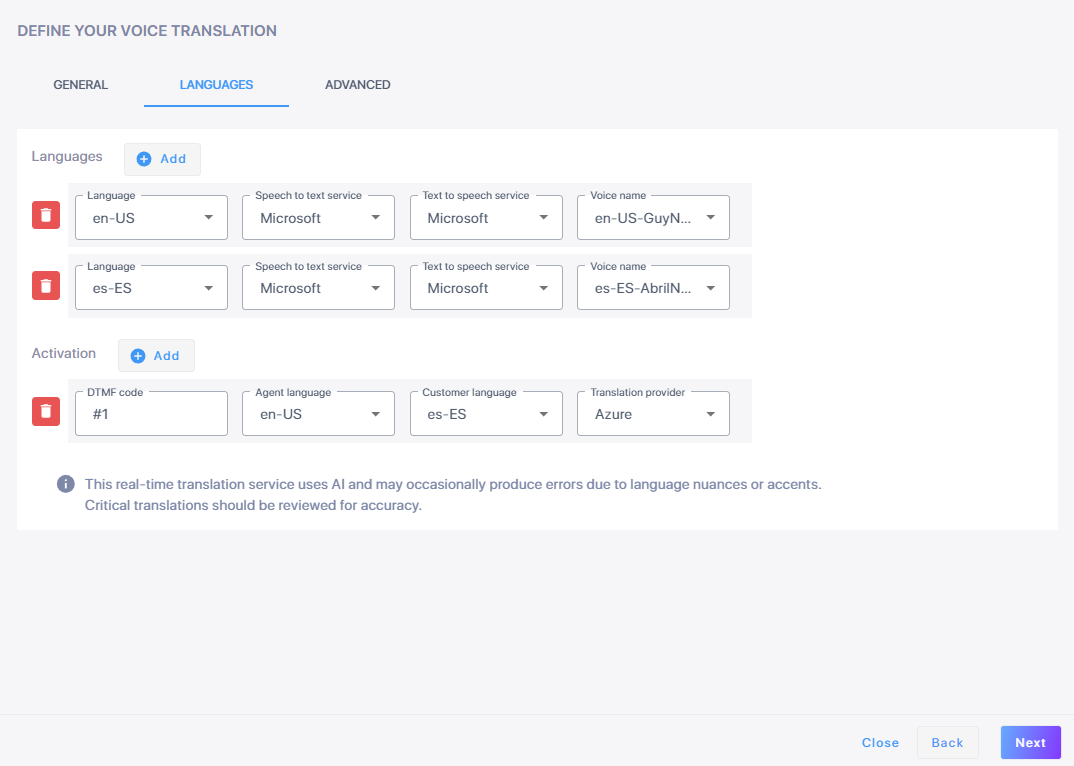
Under Languages, click Add for each language that either side might speak, and for each one:
- From the 'Language' drop-down list, select the language, for example French (fr-FR).
- From the 'Speech to text provider' drop-down list, select Google v1, Google v2, or Microsoft.
- From the 'Text to speech provider' drop-down list, select Amazon, Google, or Microsoft.
- From the 'Voice name' drop-down list, select the voice, for example fr-FR-AlainNeural (Male).
Add at least two languages.
-
Under Activation, add at least one code, and for each code:
- In the 'DTMF code' field, enter the number the agent dials to select this pairing.
- From the 'Agent language' drop-down list, select what the agent speaks.
- From the 'Customer language' drop-down list, select what the customer speaks.
- From the 'Translation provider' drop-down list, select Azure, Claude, or Open-ai.
Click Next.
Advanced
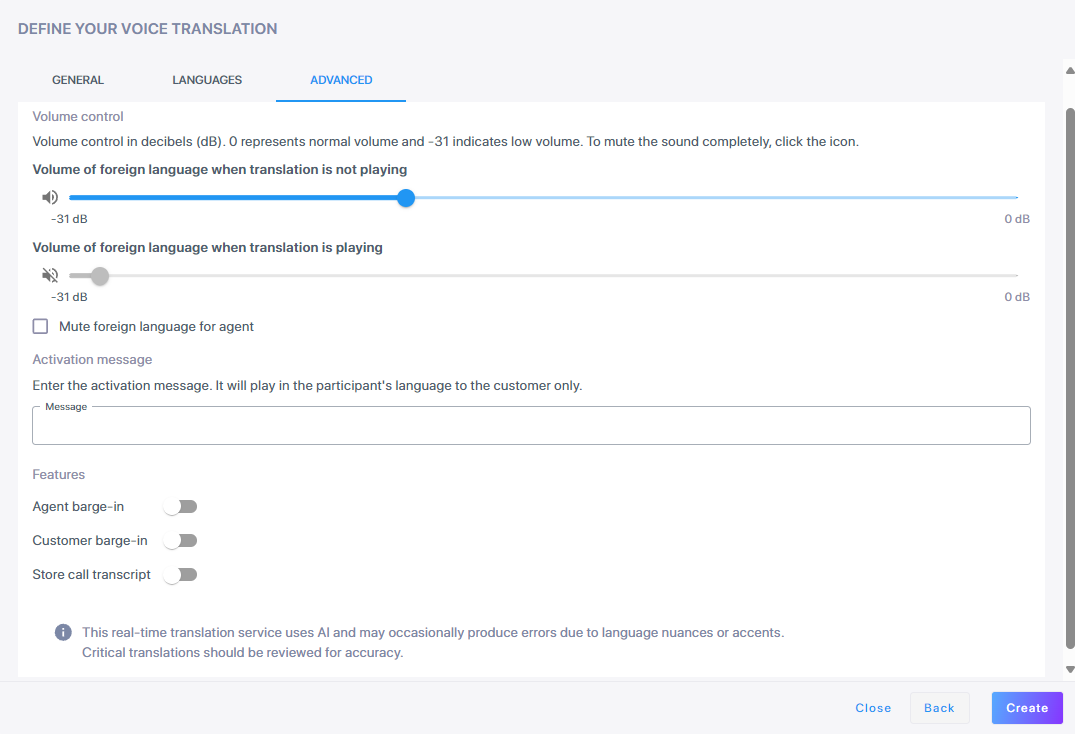
The Advanced tab controls the volume of each channel, the message the customer hears when translation starts, and the optional features.
-
Under Volume control, set how loud the original speaker is against the translation.
0dB is normal volume and-31dB is quiet.- One slider sets the level of the foreign language while the translation is not playing.
- A second slider sets the level while the translation is playing.
- The 'Mute foreign language for agent' check box silences the original for the agent completely.
Clicking the sound icon mutes the channel and disables its slider.
-
Optional: Under Activation message, enter up to 200 characters for the customer to hear, played in their own language.
With dynamic activation you can include
{from-language}and{to-language}, which are replaced by the customer's and the agent's language: "Automatic translation between {from-language} and {to-language} has been activated." -
Under Features, switch on what you need.
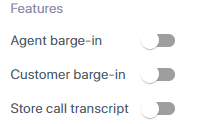
Feature What it does 'Agent barge-in' The agent speaking cuts off the translation of the customer's words. 'Customer barge-in' The customer speaking cuts off the translation of the agent's words. 'Store call transcript' Transcribes and stores both the original and the translation, for later reference or debugging. 'Allow activation code from customer' Lets the customer enter the DTMF code, not only the agent. Dynamic activation only. -
Click Create.
Enable the translation on a routing rule
A translation service takes effect only once it is switched on as a service on a routing rule. Switch it on when you add a rule, or edit an existing rule.